
Here in North America, Indian food has become quite common. However, what food makes it to restaurants here is quite limited. Mostly what makes it is a small subset of what’s actually eaten across India. North Indian food is very much represented, and to a somewhat lesser extent, South Indian food is becoming more popular in that more people know what a dosa is than they did 20 years ago. But beyond, say, butter chicken, channa masala, and naan, the offerings are limited unless you are lucky enough to find a restaurant that caters to a particular region.
Maharashtra is pretty underrepresented in Toronto’s food offerings. There are a couple of restaurants where you can find a few dishes but they are few and far between. And so, in situations like this, where I want to eat something less common here, I have to make it myself.
One of the more common dishes I saw available in Mumbai is pav bhaji. I was told that historically it was created as a healthy and filling lunch that workers could eat quickly and get back on the job. It is a mixture of mashed vegetables – which vegetables varies from cook to cook and likely based on time of year and what’s available – mixed with tomatoes, onions, peppers, garlic, ginger and spices.
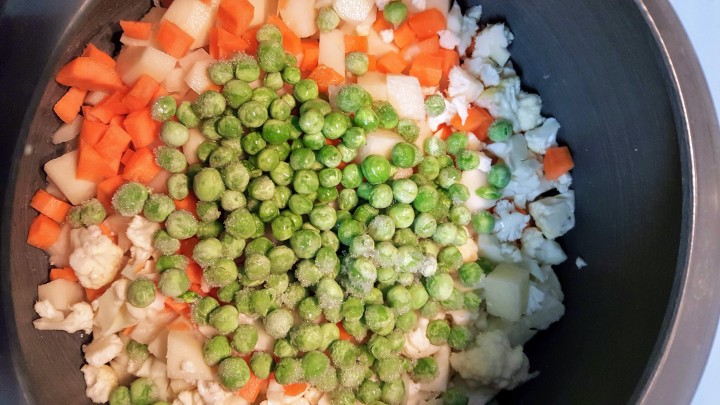
I start by chopping the veggies. In this case, I use potato, carrot, cauliflower, and (frozen) peas.


I place all of these in a pressure cooker with a small amount of water and salt.
I’ve noticed something that differs between western and Indian recipes using a pressure cooker. In western recipes it usually will say something like “Bring the pressure cooker up to pressure and cook for 10 minutes.” In some cases, it may specify high versus low pressure. My electric pressure cooker works just this way: set the timer for the desired duration, press start, and come back when it beeps.
Indian recipes using a pressure cooker say something like “Put the cooker on medium heat and cook for two whistles.” This confused me for years. It wasn’t until the last time I was in India watching someone cook that I was told what that meant. The pressure cooker is sealed and started. It will go up to pressure and when it gets there will let a short blast of steam out from under the weight. And then, it continues to cook while the pressure builds again and it lets out another blast. The duration of many recipes is counted in these blasts, or whistles.
So while I was waiting for my veggies to heat up and cook for two whistles, I prepared my onions and peppers.


As I was finishing chopping the tomatoes, my cooker gave its last whistle and I took it off of the heat and let it cool and depressurize. It is a small cooker so it didn’t take long. The vegetables were perfectly cooked and soft. I poured them in to a bowl and mashed them.

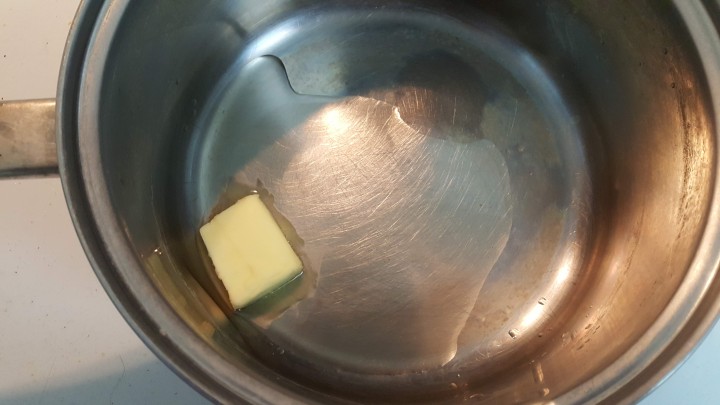
Then it was time to start the next phase of cooking. I heated some oil and butter together in a pan. If there’s one critical element to pav bhaji, it’s the butter. I’m not sure this would be nearly as good were it adapted to a vegan recipe.
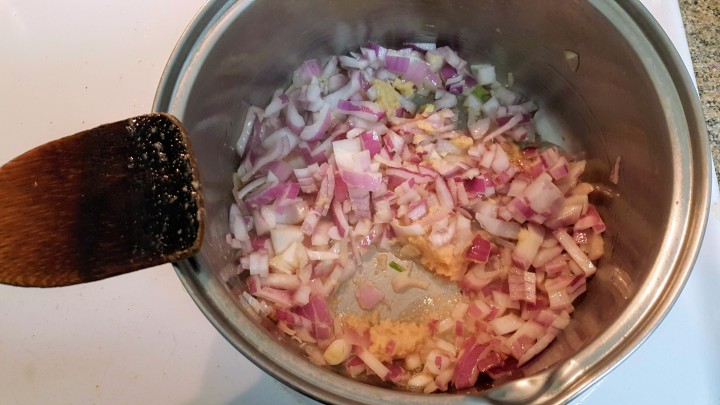
Once that was hot and melted, I added the onions, along with some chilli garlic paste and fried that until the onions were clear – not completely cooked as there are more cooking steps to come.
As soon as this step starts, the kitchen begins to smell really amazing. It isn’t long before the smell attracts Daegan who exclaims at how good it smells and how hungry he is.
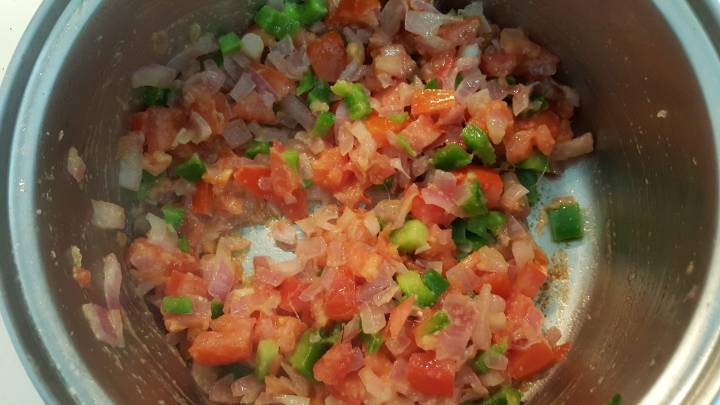
Once the onions are ready, I add peppers and tomatoes and cook until they’re soft.
When that’s done I add cumin, coriander, turmeric, red chilli powder (double the recipe requirement for Daegan and I), and pav bhaji masala (available in our local grocery store. I cook that for a minute or so and then add some water and cook it further. The smell in the kitchen is overwhelmingly delicious now and I find myself wishing I could somehow photograph that and share it here. When that’s done, I add the mashed vegetables back in along with some lemon juice, then taste and adjust the salt as needed.

Then I heat some more butter up in a frying pan and grill the pav on it until both sides are toasted nicely. When that’s done I serve the two together and top the bhaji with just a bit more butter. I’m very pleased with how it came out. This will, no doubt, be another addition to our standard set of meals.

If you would like to try to make it yourself, you can find the recipe here.

Bhaji has lots of vegetables that’s the best part.
Definitely. A great way to get the fussier members of the family to eat veggies for sure.
Looks amazingly delicious. Maybe I’ll try preparing Pav Bhaji someday at home too 🙂
Thanks! I was amazed at how easy it was. I will make it again for sure. But not too often because it has so much butter in it.
Wow! Just perfect! U May substitute butter with olive oil or any of ur choice if u are calorie conscious 😃 u can just add a little cube of butter as shown in one of ur pics! Will still taste the same. Now u can make it more often 😃
Brilliant! Thank you so much!
That sounds great! If you ever come to Houston, we have some completely authentic Indian restaurants here that I bet you would love.
You never know! There’s always a chance a business trip could take me there.
That would be awesome! Sage wouldn’t mind if I dragged you to an Indian place, right? Or let her come too! All of you! It would be a blast!
Absolutely – whether I come alone or with her that sounds like fun!
Wow! When you are inviting me? Looks so delicious 😜
Any time!
Awasome! Picture looks like a “Khada-pav bhaji if I am not wrong. It tastes better. I really liked it
I’m not sure – but looking at the recipes I see for that I think that is very likely. I really enjoyed it.
Absolutely both are the same, a bit difference is pav-bhaji is more mashed than khada pavbhaji
Ah – I was lazy so I didn’t mash it fully so I made khada pav bhaji by accident. It was really good, though.
Generally they use butter for pavbhaji not ghee but home made pav bhaji can switch to ghee.
Interesting – I bet it would be really rich. Maybe too rich tasting for me 🙂
ha ha …
Many recipes I see specify ghee. Is that just used in some recipes and full butter in others?
It depends. I’ve seen ghee used more often than butter but I’m no expert. What I can say about ghee is that it has a much higher smoke point than butter does so you can, for example, roast spices in it where you can’t really do that in butter.
That makes sense.
Wow, this is AWESOME! Yum!✌️😃❤
Thank you so much! It was really delicious. I am really glad I tried to make it instead of just holding on to my cravings until my next visit to India. 🙂
Looks absolutely delicious!
Thanks!
What a interesting dish! Do they ever add meat to this one?
Not to that one but keema pav is a similar non-veg dish. But that is still pretty different. https://timesofindia.indiatimes.com/Recipe-Keema-Pav/articleshow/53491011.cms
Thank you!! I looked at the recipe but don’t know what mutton is?!
Ah – sheep. It tastes like lamb but from an older animal.
It’s vegetarian dish with lots of vegetable but you can get jain pav bhaji where they don’t add garlic, onions and some even don’t add potatoes too. Because traditional Jain don’t eat onion, potatoes. garlic.
OH, I love all of the vegetables, I just love meat, too. 🙂
Thanks for sharing this recipe. I love Indian food and I was lucky enough to find a restaurant in Chicago that served Pav Bahji and I really liked it. I chuckled at the two whistles question as I have run into the same issue on several recipes and it took me a bit to figure it out.
Ooh it’s amazing to see you cooking indian dish 😊 try my recipe bhurji pav too.. it certainly is delightfull https://gourmetcravings19.com/2017/08/03/bhurji-pav/
That sounds delicious! I’ll definitely give it a try when I get back home in a few weeks.
M glad to hear that.. I appreciate your love fr indian cuisine.. do let me know if I can help in any ways